Skip to content
Room-by-room approach to mini splits in older Westchester homes
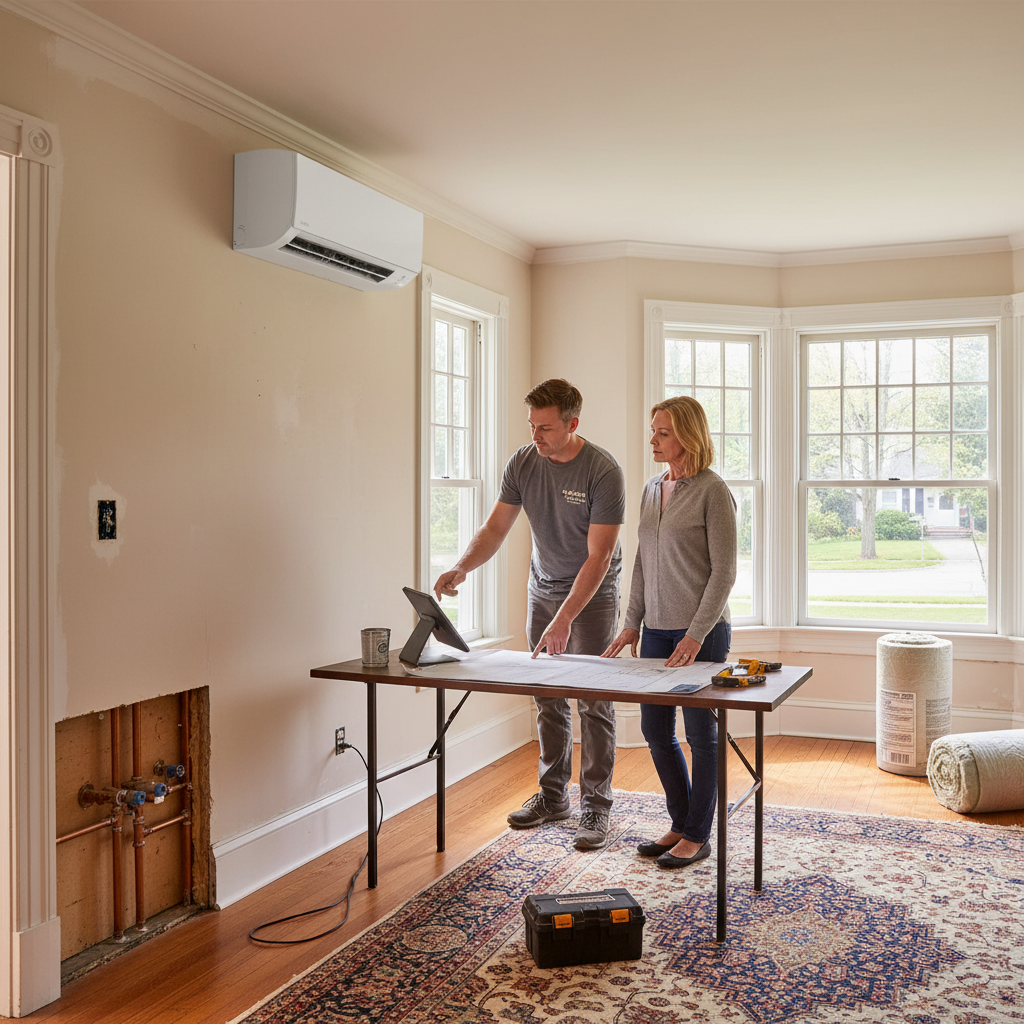
Start by creating a short checklist for each room: record square footage, ceiling height, window orientation, insulation type, and the current heating source. For mini split installation westchester ny perform a simple heat requirement estimate by multiplying square feet by a Btu factor of 20 to 35 depending on insulation and exposure, then rank rooms by highest demand. Mark locations for indoor heads, identify a straight outdoor condenser path, and note existing electrical circuit capacity before contacting an installer.
Step 1: Home survey and heat load priorities
Walk through the house with a clipboard. Measure rooms, check attic and wall insulation visually or with an infrared scan if available, and note single pane windows or drafty doors. Older homes often have uneven insulation and multiple small rooms. Prioritize sleeping areas and commonly occupied spaces first. Use a room-by-room Btu estimate to decide whether a single multi-zone outdoor unit or multiple single-zone systems makes sense.
Step 2: Electrical and panel assessment
Inspect the main service panel for spare capacity. Many mini split outdoor units require a dedicated 220V circuit. If the panel is full, consider a 200 amp service upgrade or selective circuit reconfiguration. An electrician can provide a load calculation and recommend whether a subpanel or new feeder is necessary. Avoid assuming there is enough capacity; a pre-install electrical inspection prevents costly delays.
Step 3: Choosing system type and zoning strategy
Select between single-zone heads for individual rooms or multi-zone outdoor units serving two to eight indoor units. For older homes with many small rooms, a multi-zone system often reduces outdoor condenser clutter. Match indoor head styles to room use: low-profile wall units for bedrooms, floor-mounted or high-velocity cassettes for basements and living rooms. Confirm each indoor head s capacity matches the Btu estimate for that space.
Step 4: Placement, piping, and line-set routing
Place indoor units on interior walls when possible to minimize line-set runs through historical exterior finishes. Keep refrigerant line sets under 50 feet where possible and avoid vertical drops exceeding manufacturer limits without additional oil management. Route line sets through basements or closets to conceal them. Plan a single short penetration through the exterior wall for each indoor unit and use a small, neatly sealed chase to preserve siding or masonry.
Step 5: Coordinating HVAC replacement work
If a full HVAC replacement is planned, schedule the mini split installation in coordination with ductwork removal or gas furnace decommissioning. Label and cap old duct openings to avoid air leakage. If transitioning from a central system, remove abandoned equipment and ensure condensate drains are installed properly for each indoor head. Consider keeping one central heater as backup in extreme cold if the mini split design provides adequate supplementary heating.
Step 6: Insulation and air sealing upgrades
Improve thermal performance before finalizing system sizing. Add attic insulation to R-49 where accessible, caulk penetrations around windows and utility chases, and add weatherstripping to exterior doors. Wall cavity upgrades can include dense-pack cellulose or blown-in fiberglass. Increasing insulation reduces Btu requirements and may allow smaller indoor units, saving on equipment and operating costs.
Step 7: Permits, codes, and Westchester County requirements
Contact the local building department for permit requirements in your Westchester municipality. Most installations require mechanical and electrical permits. Provide a plan showing indoor head locations, condenser placement, circuit sizing, and condensate management. If the property is in a historic district, check with the local preservation board about exterior penetrations and condenser visibility.
Step 8: Minimizing disruption during installation
Plan to install during weekdays when most contractors operate. Move fragile furniture from work areas and lay down protective floor coverings. Expect each indoor head to take two to four hours to mount, plumb, wire, and test. Outdoor condenser installation typically requires a concrete pad or vibration-isolating brackets; arrange for clear access and brief parking space for equipment delivery.
Step 9: Typical costs and timeline for Westchester projects
Costs vary with system size, number of indoor heads, and electrical upgrades. A single-zone mini split system often runs lower than a central HVAC replacement but multi-zone setups increase per-unit pricing. Allow three to seven days for a small multi-room installation including electrical work, longer if the service panel needs upgrading. Get at least three written estimates covering equipment, labor, permits, and warranty.
Step 10: Working with contractors and selecting components
Seek installers with local experience in older homes. Ask for references and examples of past jobs with similar challenges like masonry walls, limited access, or historic finishes. Confirm licensed electricians will handle panel work and that the contractor provides a detailed scope with performance specifications and maintenance instructions. Review manufacturer warranties for compressors and refrigerant circuits.
Room-specific recommendations
- Master bedroom: Use a unit with quiet operation, placed above the door or on the longest interior wall to distribute air evenly.
- Child bedroom: Select a low-profile head with built-in timers and sleep modes for energy savings.
- Living and dining areas: Consider a high-capacity wall cassette or floor console for better airflow and aesthetic integration.
- Basement or finished cellar: Choose a unit rated for cooler incoming air and plan for condensate drainage below grade, using a condensate pump as needed.
- Home office: Prioritize units with precise temperature control and quieter fan speeds to avoid noise disruptions.
Maintenance and long-term care
Schedule annual service: clean coils, check refrigerant charge, inspect electrical connections, and verify condensate drains. Replace indoor filters every one to three months depending on use. Keep an eye on outdoor condensers for debris and vegetation, and maintain clearance for airflow. Proper maintenance preserves efficiency and extends equipment life.
Common pitfalls to avoid
- Undersizing: do not rely only on rule-of-thumb sizing; run a proper load calculation for each space.
- Poor line-set routing: excessive bends or long runs reduce system efficiency and can require more refrigerant.
- Ignoring insulation: adding capacity without air sealing keeps operating costs high.
- Skipping permits: unpermitted work can complicate future sales and insurance claims.
Example comparison table: single-zone vs multi-zone
| Feature | Single-zone | Multi-zone |
|---|---|---|
| Best use | Individual rooms | Multiple rooms on one condenser |
| Initial cost | Lower for one room | Higher upfront, lower per-room in many cases |
| Outdoor footprint | One condenser | One condenser serving many heads |
| Installation complexity | Simple | Higher due to multiple indoor heads and controls |
Final planning checklist
- Complete room measurements and simple Btu estimates.
- Schedule an electrical panel assessment.
- Hire a licensed installer with Westchester experience.
- Plan insulation and air sealing before final sizing.
- Acquire permits and document the installation for future property records.
Following these steps reduces surprises and keeps older homes comfortable year round with targeted, efficient cooling and heating. Proper coordination between insulation improvements, electrical upgrades, and equipment selection results in systems that perform reliably and cut long term energy costs.