Skip to content
Start with a room-by-room checklist and clear measurements
Measure wall height, window locations, ceiling heights, and approximate square footage for each target room, then confirm that mini split installation pre war building nyc meets building rules and electrical capacity before ordering equipment. Note the location of plaster moldings, timber studs, and any masonry that may block line-set routing. Identify a logical outdoor unit location with 24 to 36 inches of clear space, and sketch an elevation showing where each indoor head will mount relative to trim and windows.
Site survey steps installers take
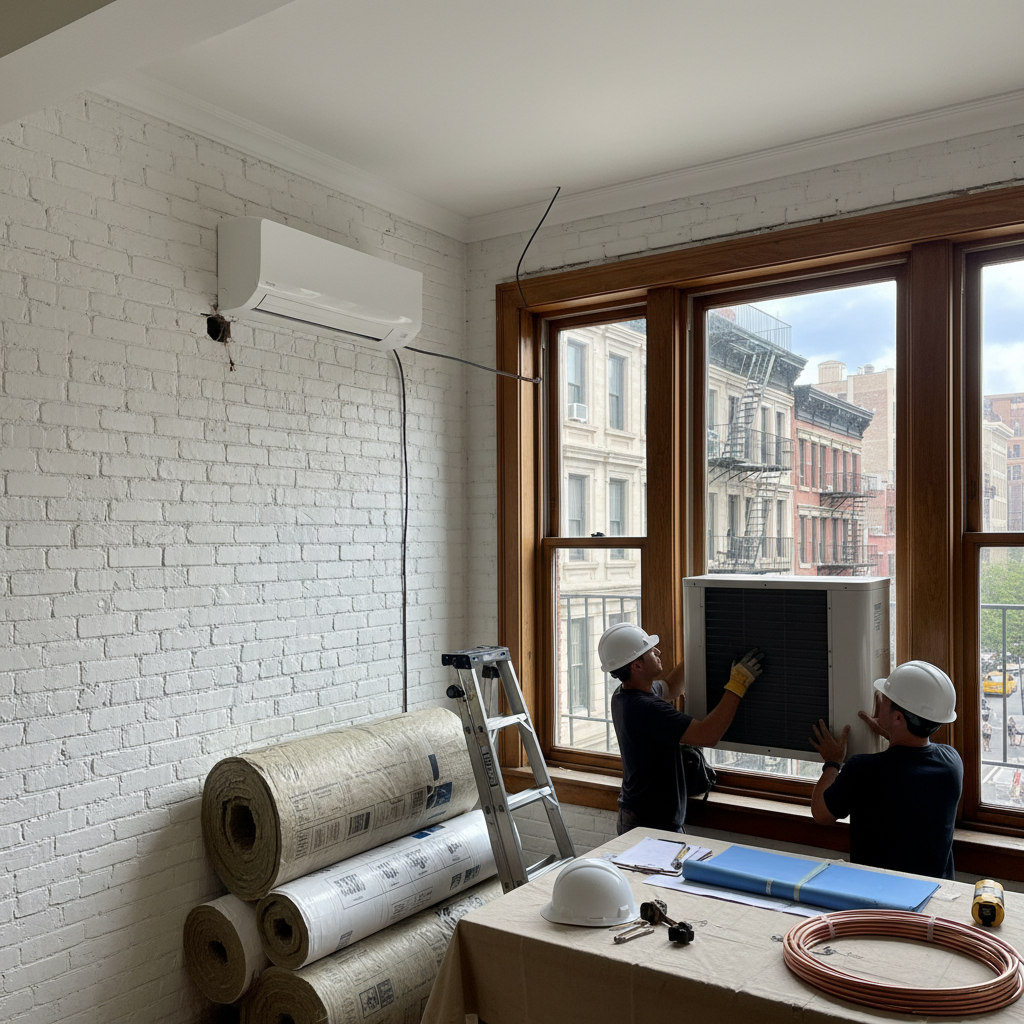
1) Photograph each proposed indoor head wall and mark 12 to 18 inches above the window or highest usable wall space. 2) Check for internal voids and chase locations to feed the refrigerant line set and condensate drain. 3) Verify electrical panel capacity and identify breakers available for new circuits. 4) Inspect balconies, fire escapes, or rear yards as potential outdoor compressor locations and confirm load-bearing surfaces for mounting pads or brackets.
Permits, landlord approvals, and building rules
Obtain written approval from the building owner or managing agent and review the buildingâs intercom and facade guidelines. For co-ops and condos, submit a scope of work describing minimal intrusion, proposed outdoor unit placement, and a plan to preserve exterior masonry and cornices. Apply for any required DOB permits or local filings; include electrical and refrigeration schematics when asked. If the building is landmarked, submit photos and a sensitive installation plan that keeps vents and lines discreet.
What inspectors will check
Inspectors focus on electrical safety, conduit routing, proper breaker sizing, secure outdoor unit mounting, and that condensate drains are trapped and routed to approved drains. They will also verify that refrigerant lines are properly insulated and protected where they pass through walls.
Electrical upgrades and circuit planning
Confirm existing service amperage and calculate the total load for new mini split outdoor units. Most single-zone systems need a dedicated 15 to 30 amp circuit depending on capacity; multi-zone condensers may require 40 to 60 amp circuits. Plan conduit and wire runs so breakers and disconnects are accessible. If meter upgrades or new subpanels are needed, get a licensed electrician to provide a written estimate and timeline for permit coordination.
Tips to simplify wiring work
- Route power through closets or mechanical spaces when possible to avoid cutting historic plaster.
- Use flexible conduit for short runs behind baseboards or inside soffits to minimize visible work.
- Label all new breakers and leave as-built wiring notes for future owners and building staff.
Line set routing and wall penetration strategies
Choose penetration points near studs or mortar joints to limit plaster repair. Drill a single hole per indoor head and run a compact line set bundle with refrigerant, condensate drain, and low-voltage cable through a protective sleeve. Use copper sleeves or insulated stainless-steel conduit where the line set crosses masonry. Maintain a slight slope on the condensate drain to a legal discharge point and install an air gap if required by code.
Protecting historic finishes
Mount surface-mounted channels inside paint-matched raceways or behind baseboards. When holes go through decorative trim, cut the smallest diameter necessary and reinstall trim with reversible fasteners. Repoint masonry carefully around any exterior line penetrations to match existing mortar color and texture.
Mounting outdoor units in tight NYC locations
Common outdoor locations include fire escapes, balconies, roof edges, and rear-yard pads. Use welded steel brackets anchored with through-bolts into bearing members for balcony or wall mounts. For roof installs, choose anti-vibration pads and secure to structural blocking. Verify weight limits and maintain safe egress on fire escapes. When an outdoor unit will be visible from the street, consider low-profile models and place them behind parapets where possible.
Noise and neighbor considerations
Pick variable-speed inverter compressors to reduce start-up noise and choose models with sound ratings below 50 dBA at 10 feet for city environments. Add isolation pads and rubber mounts to minimize vibration transfer through building structure. Communicate expected noise levels and placement plans to adjacent units to avoid disputes.
Insulation and envelope upgrades to boost performance
Improve results by sealing common thermal leaks: weather-strip operable windows, add minimally invasive wall and attic insulation where allowed, and install foam gaskets behind electrical outlets on exterior walls. Insulation reduces the required capacity of mini splits and cuts runtime. Upgrade setback thermostats and understand that insulating behind indoor heads reduces short-cycling and enhances comfort.
Recommended insulation actions
- Add cavity-fill insulation in exposed attic spaces shown safe by a carpenter. Use blown-in cellulose or fiberglass where access is available.
- Install foam board in accessible knee walls or basement ceilings to reduce heat transfer from below.
- Seal gaps around pipes and conduits with non-expanding sealing compounds to avoid widening cracks in plaster.
HVAC replacement planning and equipment selection
When replacing an old central system or window units, match capacity to room heat gain and heat loss calculations rather than square footage alone. Evaluate multi-zone systems to reduce outdoor unit footprint while serving multiple rooms from one condenser. Prioritize inverter-driven compressors and efficiency ratings that balance up-front cost and operating savings. Confirm warranty coverage, and choose units with accessible filters and service panels to simplify future maintenance.
Installer selection checklist
- Hire licensed HVAC technicians with NYC experience and refrigeration certification.
- Ask for references with pre-war installations and photos of concealed line set work.
- Request detailed proposals that include permit fees, electrical upgrades, insulation tasks, and a clear cleanup plan.
Installation timeline and typical costs
A single-zone mini split in an accessible apartment typically installs in one to two days with prior planning. Multi-zone systems and jobs requiring electrical upgrades or permit reviews often take one to three weeks from start to finish. Cost ranges vary widely with capacity, the number of indoor heads, electrical upgrades, and insulation work. Expect contractor bids to include separate line items for permits, electrical, mounting hardware, and any masonry or trim restoration.
Maintenance and seasonal care
Schedule indoor filter cleaning every one to three months depending on usage. Have a certified technician check refrigerant charge, electrical connections, and condensate drain lines annually. Keep outdoor units clear of debris and snow and verify mounting bolts remain tight after winter. Insulation and air-sealing checks every few years preserve system efficiency and prevent moisture issues around penetrations.
Troubleshooting common issues
If an indoor head cycles frequently, check for oversized capacity, poor thermostat placement, or blocked airflow. Condensate leaks usually result from clogged drains or improper slope. Unusual compressor noise can signal mounting issues or refrigerant imbalance; shut down the system and call a technician to avoid damage.
Final planning tips for homeowners and renters
Document all approvals in writing and get a copy of permits after inspection. Keep a simple diagram of line-set routes, breaker numbers, and service valve locations for future maintenance. When negotiating with building management, offer to restore cosmetic finishes to original condition and provide references for low-visibility installs that preserve architectural character. Budget for modest insulation work to maximize savings from a mini split and extend equipment life.
Resources and next steps
Request an in-home load calculation and a site survey from qualified local contractors. Compare at least three proposals that list permits, electrical work, insulation tasks, mounting hardware, and warranty details. Schedule the work in a block when access is easiest and coordinate with building management to minimize disruptions. Proper planning and the right choices for Mini Splits, HVAC Replacement, and Insulation make ductless retrofits a practical comfort upgrade for pre-war NYC apartments.